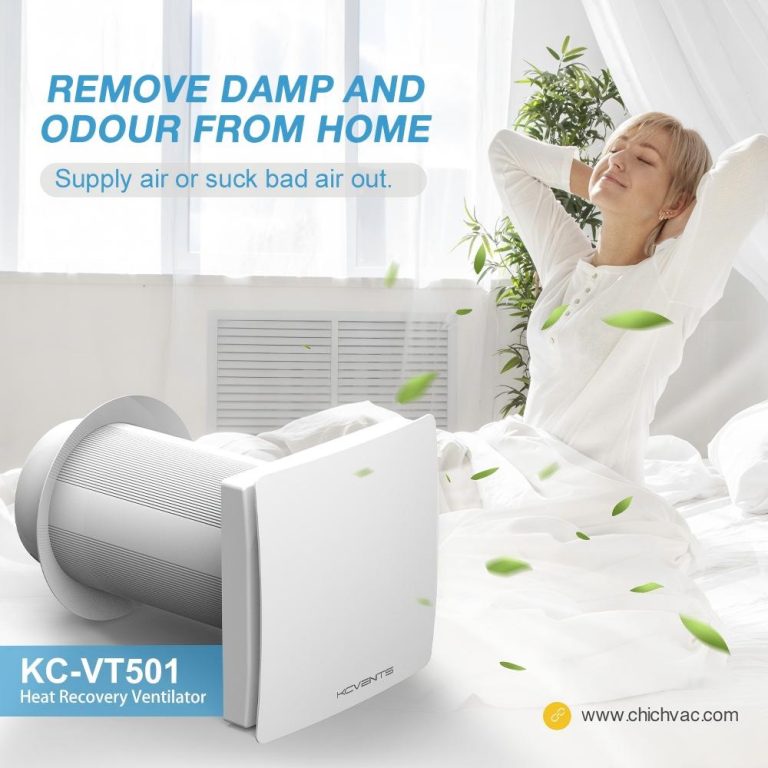

The VT501 Heat Recovery Ventilator is designed to bring continuous fresh air into your space while recovering up to 90 % of the heat from exhausted air. Proper installation and regular maintenance will ensure optimal performance and long service life.
1. Installation of the VT501
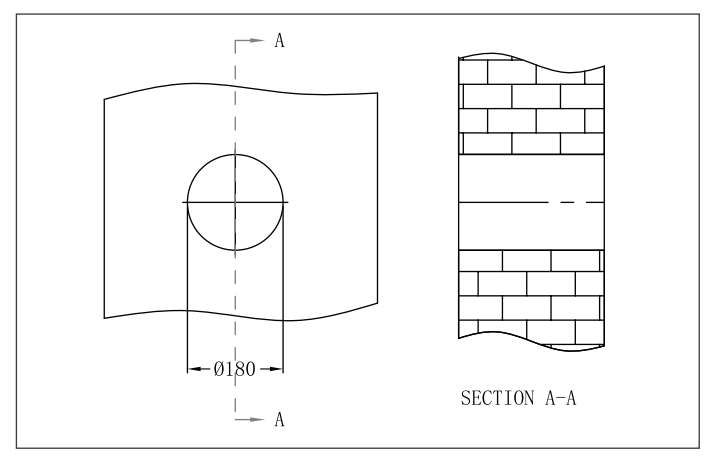
1.1 Prepare the Wall Opening
Drill or cut a round hole in the exterior wall with a diameter of 160 – 180 mm. Ensure the opening is straight and clean for a tight fit.
1.2 Assemble the Ducts
Connect the inner duct and outer duct according to the wall’s thickness.
If the wall is thinner than average, trim the duct to the correct size.
Apply waterproof sealing glue to the inner side of the rubber ring before installation.
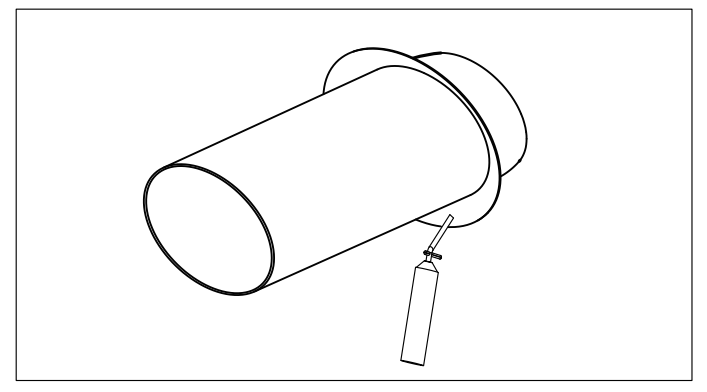
1.3 Install the Duct Through the Wall
Insert the assembled duct from the indoor side through the wall hole.
Gently pull it back so the inner rubber ring fits tightly against the outer wall surface.
Fill the gap between the duct and the wall with foam glue, and seal the indoor side with waterproof glue to prevent rainwater infiltration.
Check that the inner duct is flush and parallel with the interior wall.

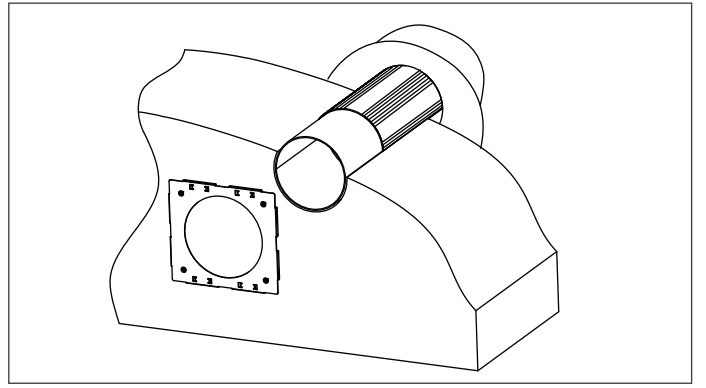
1.4 Mark and Drill Mounting Holes
Align the provided positioning sticker on the wall so that its circle is concentric with the duct.
Mark four mounting‑hole points, remove the sticker, and drill 4 × 6 mm holes.
Insert the rubber plugs from the accessory pack into the holes.
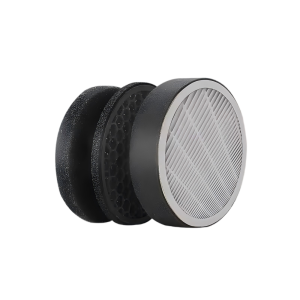
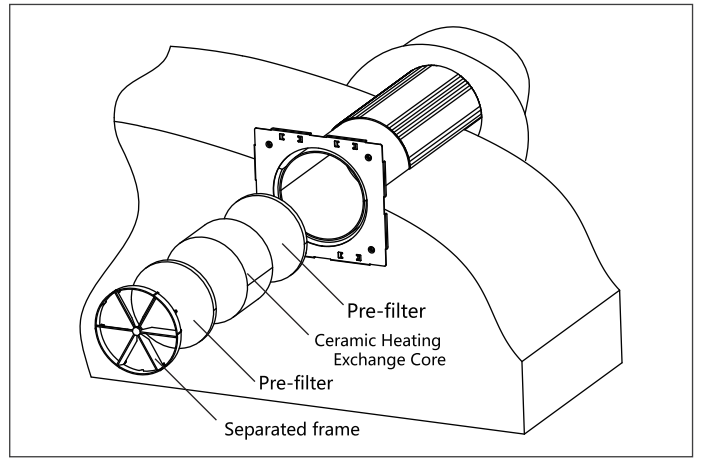
1.5 Install Filters and Core
Place the following components inside the telescopic duct in order:
- First filter
- Ceramic core (heat exchanger)
- Second filter
- Airflow rectifier
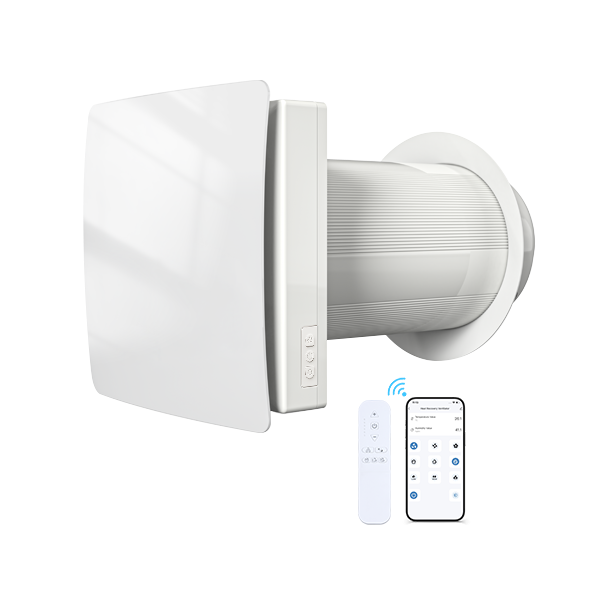
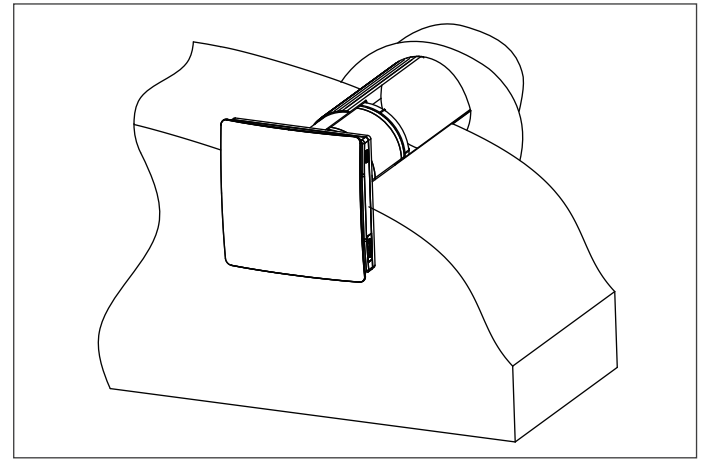
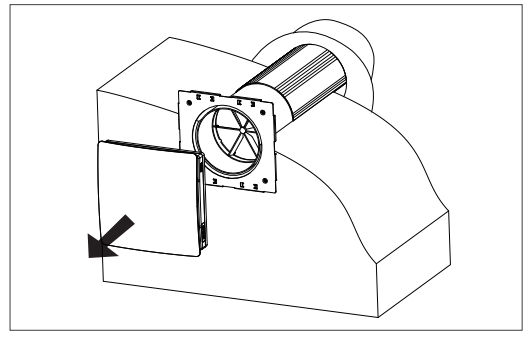
1.6 Attach the Ventilation Unit
Mount the ventilator body onto the mounting plate.
The unit attaches firmly using built‑in magnets for secure but easy removal during maintenance.
⚠️ Caution
Do not install the VT501 behind curtains, blinds, or furniture that could block airflow.
Restricted airflow leads to dust buildup and reduced ventilation efficiency.
Ensure clear space around the ventilator for optimal performance.
2. Maintenance of the VT501
Always disconnect the power supply before servicing the ventilator.
Routine cleaning and inspection will keep the device working quietly and efficiently for years.
2.1 Fan Maintenance
Gently remove the ventilator from its magnetic mounting plate.
Clean the impeller blades with a soft brush, cloth, or vacuum cleaner.
Avoid using water, abrasive detergents, solvents, or sharp tools.
Perform this cleaning once per year or as needed if dust accumulates.
2.2 Regenerator and Filter Maintenance (4× Per Year)
- Remove the airflow rectifier.
- Remove the front filter located before the regenerator.
- Gently pull the ceramic core (heat exchanger) from the duct — avoid excessive force.
- Remove the rear filter after the exchanger.
Filter Replacement:
Replace filters whenever they appear dirty, at least four times a year.
Replacement filters are available from authorized distributors.
Regenerator Cleaning:
Even with regular filter changes, fine dust can collect inside the exchanger.
Use a vacuum cleaner to remove debris once per year to maintain high heat‑recovery efficiency.
3. Application Scope
The VT501 is suitable for small and medium‑sized spaces, including:
- Offices and classrooms
- Bedrooms and living rooms
- Apartments and bathrooms
It’s compatible with both new construction and renovation projects, ensuring continuous fresh air and balanced humidity across all seasons.
4. More Information
For installation videos, technical specifications, or product details, please visit our official website:
www.Beiaole.com